|
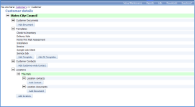
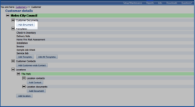
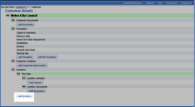
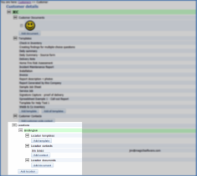
Attach Templates, Contacts and Locations to a customer in magic5. Straightaway you will be able to see which documents, locations and contacts have already been set up for a customer. Right-click to remove or left-click to edit existing details. |
Add document |
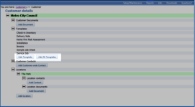
Click on the button as shown and you will be asked to select the document from folders on your computer. | |
Add template/Add all templates |
"Add template" asks you to select a single item from a drop-down list of available templates and "Add all templates" will check that you are sure before adding all templates in the template list. It is possible to remove templates so this may be an efficient way of attaching a lot of templates - attach all and then remove the unwanted ones. | |
Customer-wide contact |
Enter details for a customer contact for this who is not based solely in one location. This usually refers to someone overseeing operations at head office or a contact in the finance office. | |
| *Full name | Enter the full name of the contact as it will appear on correspondence and documents. | |
| Job title | Enter the job title of the contact as it will appear on correspondence and documents. | |
| Enter the email address of the contact as it will appear on correspondence and documents. This may also be used to send correspondence so it is important that it is kept up-to-date. | ||
| Phone number | Enter a phone number (usually a landline) of the contact as it will appear on correspondence and documents. This may also be available as a dialing option on a device so it is useful to keep up-to-date. | |
| Mobile/cell number | Enter the mobile phone number of the contact as it will appear on correspondence and documents. This may also be available as a dialing option on a device so it is useful to keep up-to-date. | |
| Fax number | Enter the customer's fax number. | |
| Contact flag | Select the contact type flag from this drop-down list - at present there are two types so that a head office contact can be set up to receive financial correspondence only or only information relating to the work being carried out. As there are 2 flag prompts it is possible for the same contact to fulfill both of these roles. | |
| Contact flag (2) | Select the contact type flag from this drop-down list - at present there are two types so that a head office contact can be set up to receive financial correspondence only or only information relating to the work being carried out. As there are 2 flag prompts it is possible for the same contact to fulfill both of these roles. | |
Add or amend location |
Multiple locations can be added to a single customer. More details are available at Locations for a customer |
|
| *Location name | Enter a name that clearly defines this location from others in the customer's organisation. | |
| Address | Enter the address of this location, remembering that it may be used in correspondence. | |
| Post code | Enter the customer's post code. | |
| Phone number | Enter the customer's phone number. | |
| Fax number | Enter the customer's fax number. | |
| Sage code |
A unique code for synchronising with a Sage system. If you don't know what this means, then you should leave it blank. |
|
| Site code | A piece of text (usually from a third party system such as Sage) used for reference only. | |
| Region or location group |
A list can be created to hold groups of locations that reflect the organisation of customers. These may be regions (such as South West, North East), counties (Sussex, Norfolk, etc), countries (UK, Ireland, Holland) or any other location grouping required. These groups can be allocated to users so that, for instance, the Regional Manager for your customer can access reports in their regionwithout being associated with every individual location. See Users and Create list for more information. Select the location group from the drop down list to include this location in that group, thereby making it available to any users (customers) associated with the same group. NB in order to appear here, the list must be called Location groups. |
|
| Notes (office only) |
Free text that will be displayed for administrative users only. The notes can be displayed by adding them to an associated Job definition using a 'Display-only information (not saved)' Job definition item type and, in the 'Format/value of auto-generated item prompt under the Advanced tab', entering For example, “only send engineer with X2 qualification” will remind an administrator that some engineers may be more suitable than others for this customer or location. Office notes can also be displayed on the device in a default value field for an item type on the template, although this is uncommon. |
|
| Notes (available on device) |
Free text that will be displayed for device users only. The notes can be displayed by creating a General output data item type with an entity type corresponding to where the notes are attached (eg customer or location) and, in the 'Additional details to display (advanced)' text box enter: For example, "report to site office" or "send extra copy of report to head office" will remind a user about particular behaviours for this customer, location, etc. Device notes can also be displayed on the device in a default value field for an item type on the template.
|
|
Add location details |
Use these buttons to add location specific templates, contacts and documents. The questions asked are the same as for the templates, customer-wide contacts and documents above. |

